Thursday, July 28, 2011

Modeling III: Process 13 - Texturing the Model

Today was an incredibly busy day, and to be honest the most interesting. I was really curious how I was going to go about the texturing for the model and thank god I have a good idea. Thanks to a quick demo, we were able to understand how to give textures a more "appropriate" feel.


It was kind of neat to see how it looked with a little more depth; however, there was a few problems on my part (and it was my fault). The Model and the Unwrap aren't necessarily up to snuff. So, in turn, the lightning being baked into the texture came out a little odd.

As you can see below, some of em came out alright, but others didn't because of how I modeled the character and unwrapped it.
The render below shows the character with a simple skin and the previous lightning texture together. It doesn't look so great and needs a lot of work.


Now I had to fix this to make it seem less "retarded." So it was off to photoshop. I messed around a little bit and came up with an ok process that might help a little bit. Again this is only the first step into texturing. I have to fix this up before I go into any detail.

This may not seem too great right now, but as a beta, it took care of some weird splotches. I am going to work on the shoes next.

Here's what the newest render looks like with the alterations to the texture. I am still in the process of fixing the shoes.

Finally, here is some progress screenshots from the work I am doing in Photoshop, and 3DS Max.


Tuesday, July 26, 2011

Modeling III: Process 12 - Full Model with UVW Progress

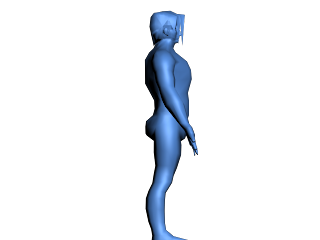
I went ahead and finished my model (finally). So far I would say that it is so much better than before. Not perfect, but a great improvement nontheless. Below is some quick renders of the whole body.

After I made the model, I went ahead and did my own variation on a UVW. In the beginning I used Unwrella, which seemed to go pretty well. I found some very decent tutorials and I figured I'd give it a shot. However it wasn't a walk in the park (or at least for me). If it wasn't one problem, it was another.

As you can see from the picture below, this is not what a UVW should look like in the slightest. I wasn't too happy with it and scraped the idea.

I then took a different approach with the unwrap. As you can see from below.


It was simpler and more efficient. It may not be perfect thus far, but it is progress. It is beginning to look more like a proper unwrap; however, like I said, there is much work yet to be done.

Thursday, July 21, 2011

Modeling III: Process 11 - Full Model Version 2 Beta

Today was a complete overall today. I was aware that things were not turning out at all, but I did get some help. Someone was kind enough to guide me into the right direction, and I was able to make a new rendition of my previous model. Below is some progress I have up to this point. I am not completely done, but I will be this coming Saturday and will have a working UVW Unwrap prepared for the following Tuesday.


Here is the overal process I got so far for my new model:

Here is some quick renders for the front, side, and back. I was surprised I was able to give him some sort of butt.


Tuesday, July 19, 2011

Modeling III: Process 10 - Beta Full Model

Not a really good rendition on this one. There was quite a bit of mistakes that need to be taken care of. In general, I really just want to take what I got and have a complete overall. I am not properly understanding the modeling process as well as I hope to, so perhaps I can get a tutor to help me out. This has already been shown, but I will upload pics up to this point.

Non-Render


Rendered


Thursday, July 14, 2011

Modeling III: Process 9 - Head Final Rendition

 I made a few tweaks here and there. I am not super duper happy with this head, but I will say that it came out better than I thought it would. Here is some screenshots...


Up above you see the process I took into doing the hair for my character. I used my original character sheet, and tried to replicate it as best as I could. You will also notice in the first frame there is my original head model underneth. I tried to use a modifier called Hair and Fur; however, it didn't work to my advantage.
In this picture, you will notice I put the hair/headband on top of the head I already had for my character. It makes the head look less goofy (Thank God). It still could use work, but I will roll with this for now.

Here is some single renders of both the front and side of the head model...


Tuesday, July 12, 2011

Modeling III: Process 8 - Rough Idea of Head Part 3

Another day, and another dollar. I went ahead and tried a new tutorial for making a head because I obviously wasn't going anywhere.

http://www.3dtotal.com/ffa/tutorials/max/joanofarc/head1.php

The link above is a tutorial to the infamous Joan of Arc tutorial. I basically took the initial process of the head and went on my way. I will have to say that this process is tedious to a fault, but if one takes the time to adjust it, it will come out pretty damn good. I am still getting used to modeling (of course), but I think this head model came out a lot better than my previous one.

Thursday, July 7, 2011

Modeling III: Process 8 - Rough Idea of Head Part 2

It looks like progress is nothing more than progress. I am not entirely happy with how things are leading up to this point. As you can see from the image below, it looks nothing like it should. In fact, it looks like   a little kid put a bunch of shapes together and called it a face.


I am obviously not happy with my overall process and methods. I still need to find this nitch. What are my strengths and what are my weaknesses? So far one of my strengths I guess would be Flash. I like to mess with vector art even if I am not the best at that either, but I do enjoy it nonetheless. Now my biggest weakness so far is probably working with a 3d surface. I am not yet familiar with these tools (even if we have had numerous classes in the field in regards to 3d modeling, I still feel I don't yet get it). With that said, how can I take a strength I have and put it into play with something that is my weakness?

I tried a little experiment with my model sheet. It involves using planes to make shapes happen. The concept is pretty simple and I figured It'd work out alright in my head. Working in 2D with a 3D object. Not a bad blend for someone who enjoys 2D art right? Well not exactly as you can see from my model below.


Sure the concept is there, but it still has some issues. Maybe the process is looking better than what I had before, but I guess I need to still find something that works best for me.

Tuesday, July 5, 2011

Modeling III: Process 7 - Rough Idea of Head

Since Tom Cruise was my model, I figured I'd try to find some Tom Cruise portraits. I am not going to lie, I had a little trouble finding ones that represented my vision; however, I think I got a pretty ok idea. I have a lot of work to do, and I need to understand the concept of modeling further, but this is an idea of how I will go about it. If I have to (which most likely will happen), I'll just redo it all over again until i get it right. My previous models might of looked bad, but I sure hope to get at least one thing right in this class.